Quick Editor
Shift Worship Tips: Quick Editor
Out of all the options for digital media, Shift Worship stands out as a go-to resource for churches with leaders and creatives looking to boost their visual services. In this segment, on Shift Worship Tips, Mariah and Dale are excited to expand on one of their favorite features – the Quick Editor. This tool is used and loved by so many people who want to take their service to a new level with customizable media! Jason, one of Shift Worship‘s designers, walks Mariah and Dale through his thought process while using Quick Editor!
Jason Demonstrates Quick Editor
Jason kicks off the demo with an exciting concept that he has been considering called – “Forward.” To bring this idea to fruition, he decides to use the vibrant and visually captivating Colorful Cosmos collection. To get started, Jason heads to the collection’s page and clicks the “Quick Editor” button. In a flash, he is ready to use the customization tool. With the option to choose the size and format of the design, Jason decides to go with a motion title, an amazing feature that Quick Editor offers.
Choosing the Perfect Text and Font
Quick Editor lets you choose from a variety of backgrounds and pre-designed titles (motion and stills). Jason begins with a blank background and clicks on the text option, and changes it to say “Forward.” If you’re not happy with the default font, don’t sweat it – the Quick Editor has the option for you to select from a range of fonts. (Pro tip: Upload your own font to make it better) Jason then switches to the “Summer Loving” font that he has already uploaded from his computer, and then gives his text a fresh and unique look. A quick change of color to white, a font size adjustment, and some centering, and his title is ready for the next step.
Creating Depth and Style
Jason knows that adding depth (simple colors) to your text can make it stand out even more. He duplicates the text layer and changes the color to a vibrant color, creating a stunning drop shadow effect. This simple yet effective technique adds a layer of sophistication to the design. With a few adjustments, he achieves the perfect look.
Fine-Tuning the Subtitle
With the title complete, Jason moves on to the subtitle: “Always Moving.” He demonstrates how easy it is to adjust the text layout for a two-line effect and fine-tunes the font size and letter spacing. A change of color to a bright blue gives the subtitle a retro 80s vibe, adding a unique touch to the design.
Adding Decorative Elements
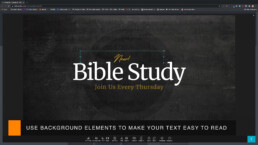
Jason takes the design up a notch by introducing elements. Quick Editor offers a wide range of built-in elements that you can incorporate seamlessly. Jason selects transparent triangles and skillfully positions them, achieving a captivating effect. Duplicating and fine-tuning the triangles on both sides of the title brings balance and symmetry to the composition. An adjustment of opacity blending further enhances the overall look.
Customizing with Personal Elements
For a final touch, Jason showcases how you can upload your own elements into Quick Editor. This feature expands your creative possibilities, allowing you to tailor your design to your unique vision. This is a great feature to incorporating a church logo into your slides. In this case, Jason adds an arrow graphic to accentuate the message of moving forward. The result is a striking and dynamic design that perfectly complements the sermon series concept.
Exploring Motion Backgrounds
But Jason’s not done yet. He realizes that the design could work equally well as a motion title. With a few clicks, he explores various motion backgrounds available in Quick Editor. The options are diverse and visually captivating, offering a broad range of choices. It is also very simple to switch from background styles, without having to restart your work. Jason settles on a dynamic background that beautifully complements the design.
Rendering the Final Creation
Once satisfied with the design, it’s time to bring it to life. A simple click on the “Render” button sends the project to the renderer, where it’s transformed into a stunning motion background. Shift Worship sends you an email once the render is ready for download. With Quick Editor, you have the power to create custom-made sermon titles, social media graphics, announcement slides, and much more with ease and creativity.
Available to Everyone
The best part is that Quick Editor is available to all Shift Worship users, including those on the free trial. You can explore its full potential with both the Media Plan and the Pro Plan. What’s more? Every collection on the Shift Worship site is Quick Editor-compatible, providing endless possibilities for your creative projects.
In Conclusion
The Shift Worship Quick Editor is a game-changer for churches and creative individuals looking to take their services to the next level. With its easy-to-use interface, a large library of elements, and the ability to upload your own, Quick Editor empowers you to design with ease and precision. Jason’s demonstration shows just a small amount of the tool’s potential, and with a little exploration, you’ll discover its countless creative possibilities.
We hope you’re as excited as we are about the Quick Editor. As Jason said, the possibilities are endless, and we can’t wait to see what you create with it. Stay tuned for more Shift Worship Tips, where we’ll explore more collections and features. Thank you for joining us, and special thanks to Jason for his enlightening demo. Until next time, stay creative and inspired!
Shift Worship Tips: Illumination Collection
In this segment of Shift Worship tips, Mariah and Dale delve into the captivating world of the Illumination collection. As they show and demonstrate the various media within this collection, it becomes clear that it offers a unique and visually stunning experience. Let’s follow along!
The Illumination collection captivates congregations with an enchanting blend of visuals that make you feel as though you are floating in space. (Dale is using one of the pixelated graphics of the collection as his background). The dark palette of this collection creates a perfect backdrop for white or light-colored text. This collection can be used anytime during the year! The convenience of using white text on dark backgrounds eliminates the need to search for the perfect spot to place your text.
One of the best aspects of this collection is the variety of media it offers. With almost two variations of each backdrop, you have the choice of using motion backgrounds or still backgrounds. The pixelated media, reminiscent of a video game, incorporates a unique element to your services. Also, each file comes in multiple formats, from HD to 4K, (triple wide as well) ensuring that you can pick the one that fits your screen size as well as your desired use. This flexibility extends to the downloading process, allowing you to choose between Dropbox or a direct download to your computer.
Here at Shift Worship, we are big on making your service design and planning as easy as possible. This is why some of our collections come with pre-existing text, while others are left blank. You can use these pre-designed slides or customize them to match your needs. The font used is also linked on the right side of the collection page. Use this link to download the matching font and then upload it into Quick Editor.
While browsing through the Illumination collection, we suggest utilizing the three countdowns! You will see a 10-minute, 5-minute, and trivia countdown. Our team regularly updates trivia countdowns with creative questions and answers to engage your congregation as they prepare for the service. These trivia sessions are a fantastic way to keep your audience engaged and interested!
Mariah, a self-proclaimed social media enthusiast, emphasizes the value of the collection’s social media resources. The fonts and styles in these assets are especially interesting. However, it’s important to note that the existing text on these resources cannot be edited. If you want to make changes or add your church’s logo and/or handle, you’ll need to utilize Quick Editor. Mariah walks us through how easy it is to customize social graphics, even for those who may not consider themselves designers!
Dale and Mariah are big fans of Quick Editor and express that it is designed to be user-friendly. There’s no need to be a professional designer to make the most of it. Quick Editor is a powerful tool that anyone can utilize with ease. The Shift Worship team is always ready to provide support and assistance if you encounter any challenges!
Shift Worship offers two subscription plans, the Pro Plan at $249 per year and the Media Plan at $149 per year. The Pro Plan provides access to Dropbox, simplifying the download and sharing of files. The Media Plan is an affordable option for members who do not require Dropbox access. Both subscriptions include unlimited access to a wide range of resources as well as weekly media additions.
The Illumination collection is an amazing collection that churches and worship services can benefit from using. Shift Worship Tips gives us a full understanding of the unique aspects of the collection and how to utilize them in services. It’s clear that Illumination is created to cater to both design enthusiasts and novices alike. So, whether you’re planning a calm church service or an engaging social media post, the Illumination collection from Shift Worship has you covered!
How to Make Your Media More Interesting
Upgrade Your Media with Design Elements
Maybe you’re an expert in media content, maybe you’re a newbie-we made it easy to look like a pro but without the hassle.
What Are Design Elements?
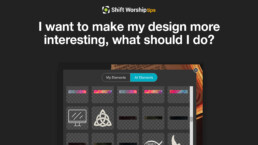
Design elements are considered “extras” placed media curated by you or other sources (like Shift Worship). They have many names like stickers, extras, elements, ect- all depending on where you are editing content.
They are typically symbols, images, or existing text that are designed to add embellishment or style, tailored towards specific needs.
How to Use Elements
Depending on the software, elements can exist on that site (like Shift), or you can upload your own items. For ease of use, we will walk you through the Quick Editor software.
Step 1: Open Quick Editor and choose the media you wish to edit.
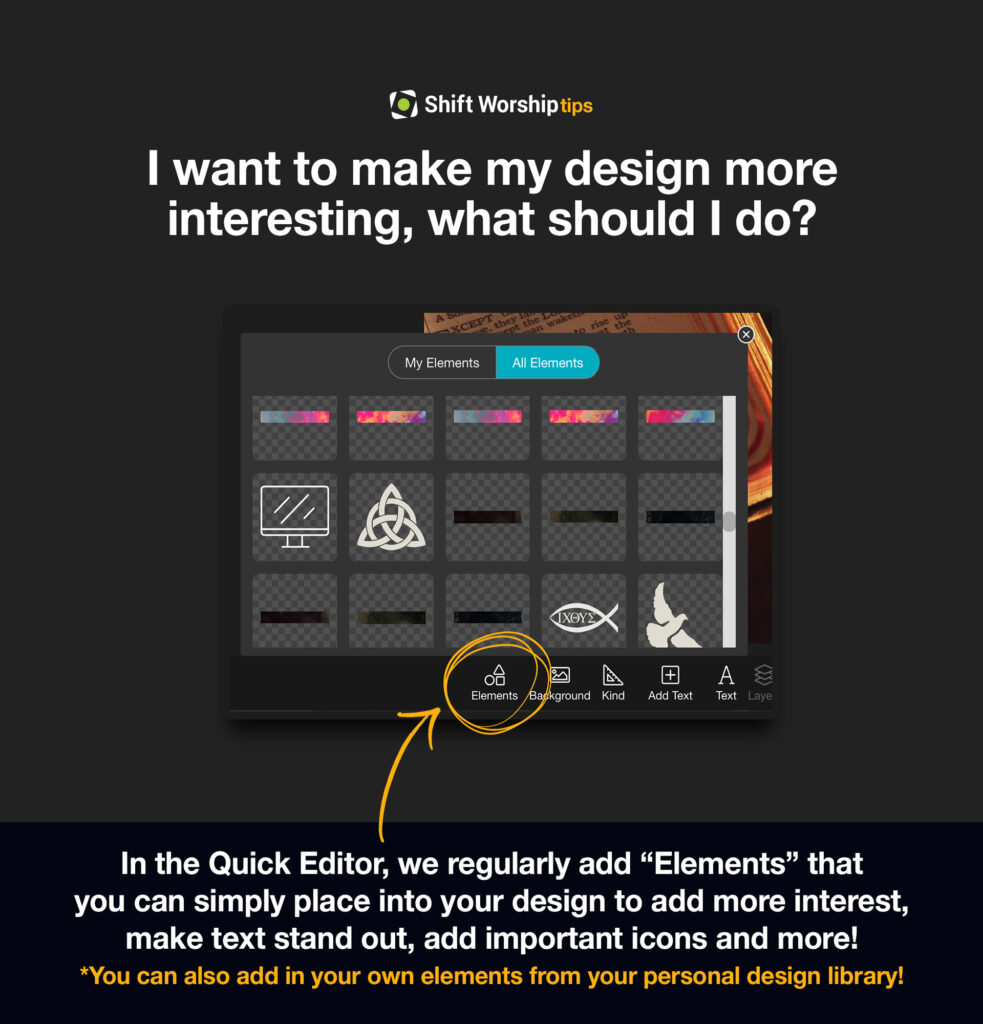
Step 2: Head to the ‘Elements’ section (bottom left), and select to open.
Step 3: You will see a section where you have the capability to upload your own ‘My Elements’ (like a logo), or select the ‘All Elements’.
Step 4: Browse and select one or multiple elements that you wish to appear on your media.
Step 5: Adjust and resize the chosen elements.
Step 6: Add text (if you need it), make final adjustments, and click ‘Render’ (bottom right) to download your media!
Did You Know What the Quick Editor Can Do?
The Quick Editor on ShiftWorship.com is a powerful tool for fully customizing your on-screen graphics without any other software or even leaving the site. Click the Quick Editor button on any collection and try it out. It’s fun!
What Is The Quick Editor?
The Quick Editor is an in-browser, editing software system designed by Shift Worship! In simple terms, this is a great way to customize your media without leaving the site and/or having to constantly download and re-upload items.
We have generated trending material for you to use during your services, but now it is up to you to make it fit perfectly in your church! This is a great tool for adding multiple languages and extra details to your Sunday slides.
Customizing Your Media
Customizing your media is a great way to connect with your community. Guests will feel as though they are truly being poured into by media and staff that are fostering their faith.
Highlighting volunteers, showcasing photos, calling for prayers, encouraging communion and service are all great ways to customize your media!
Adding Your Own Fonts
Adding your own fonts is very simple with the Quick Editor! We do offer several different fonts in the Editor, but if you want to add something extra special-no problem!
Our software works great with Google and Adobe fonts that you can purchase on your own, download, and then upload into Quick Editor. Once your front is uploaded, it will save to your account so you can continue to use it on other media you wish to edit.
You can find your fonts when you open Quick Editor, select the “Text” option, and view the fonts already included. To upload your own fonts, select “Advanced: Use Your Own Fonts”, and then select the file you wish to use.
Pro Tip: Some of the fonts that are used on our backgrounds may not be available for your immediate use, but our producers have linked the fonts so that you can easily find where they came from.
Adding PNG Images
Let’s say you wish to include your church logo or photos from a previous event. Have the images you wish to upload ready to go by ensuring they are in a PNG format. Most computers can reformat this if necessary!
You will then open Quick Editor, select the “Element” options, select “My Elements”, and then drag them from your computer to upload! Quick Editor will save these elements so you can use them on other media as well. Once you decide which element you wish to have on your slide, simply select the one under “My Elements”. It will then appear on the slide you are customizing. From here, you can move, resize, and change the layer of the image on your slide.
Pro Tip: You can add as many images and actual elements as you wish!
Motion vs. Still Backgrounds
The Quick Editor at Shift Worship allows you to edit both still and motion backgrounds, in several different formats. If you are editing one type of background and wish to change it, you can select the “Kind” and choose what you need.
If you are wishing to change the background as a whole, then you can select “Background” and choose from the other items in the collection.
Pro Tip: Motion backgrounds are great for worship lyrics, and elements of the service that require engagement. Still backgrounds are often used when more information is required on the slides such as sermon points, scriptures, and announcements. The choice is yours!
Editing With The Quick Editor
Customizing your media with the Quick Editor is designed to be as easy and simply as possible. We create the graphics that you need, and then it is up to you to add that extra something special!
If you are already a member with us, make sure you are creating your own media and sharing it during your services. If you are not a member with us yet, but are interested in trying us out-you are in luck! Shift Worship offers a 30-Day Free Trial where you have the ability to explore all our media and test out what the Quick Editor can do you for and your worship experiences.
How to Set Up Dropbox for One-Click Collection Downloads
Pro Members have access to one of the best features on Shift Worship. You can download entire collections with just one click. It’s easy to set up, and it’s even easier to use.
Just click the “Enable Dropbox” button on any collection and then log in to your Dropbox account to connect it to our site. Then select which parts of each collection you’d like to download. After that, you’ll be able to click on the “Sync” button on any collection page and find your files in your Dropbox folder.
Dropbox Integration
Shift Worship’s subscription comes with a seamless Dropbox integration, providing you with a convenient and efficient way to access and download content. With this feature, you can easily link your own Dropbox account to the Shift Worship platform. By having your personal Dropbox account connected, you can enjoy a swift and hassle-free download process.
Setting Your Preferences
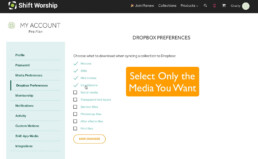
Explore the tailored convenience of Shift Worship’s Dropbox preferences, allowing you to personalize your download experience with precision. In your account settings, you have the ability to fine-tune your Dropbox integration, ensuring that you receive only the media you need without sifting through the entire collection.
This targeted approach ensures that your Dropbox folders remain organized and clutter-free, containing only the assets relevant to your creative projects. Shift Worship’s Dropbox preferences empower you to make the most of your subscription, delivering efficiency and simplicity as you seamlessly integrate high-quality media into your work.
Here’s the how-to:
1. Navigate to Your Account Settings:
Log in to your Shift Worship account and locate the “Manage Account” section. This is typically found in the top-right corner of the platform.
2. Access Dropbox Preferences:
Within your Account Settings, find the dedicated “Dropbox Preferences” tab. Click on it to enter the customization options for your Dropbox integration.
3. Specify Content Types:
Choose the specific types of content you need for your projects. Select from options such as stills, motions, social media, or other media formats that align with your creative requirements.
4. Save Your Preferences:
Once you’ve fine-tuned your settings, be sure to save your preferences. This ensures that each time you download content from Shift Worship, it aligns with your specified choices, streamlining your workflow.
What is Dropbox?
Dropbox, a versatile cloud storage platform, serves as an invaluable tool for those immersed in the realm of digital church media for worship services. Imagine a secure virtual space where you can store, access, and share your media files effortlessly.
Premise of Dropbox:
Dropbox acts as a digital sanctuary for your worship media, offering a centralized hub accessible from anywhere with an internet connection. It’s more than just storage; it’s a collaborative powerhouse that facilitates seamless sharing and synchronization across devices.
Benefits for Digital Church Media:
1. Accessibility: Access your worship media files anytime, anywhere, fostering flexibility and ensuring you’re equipped for impromptu edits or last-minute adjustments to your service content.
2. Collaboration: Collaborate with fellow team members by sharing folders, enabling real-time updates and fostering a collective approach to crafting impactful worship experiences.
3. Security: With robust encryption and authentication measures, Dropbox ensures the security of your sensitive worship media, providing peace of mind in handling sacred and confidential content.
Uses in Digital Church Media:
1. Media Storage: Store a variety of digital assets, including worship songs, sermon slides, images, and videos in a neatly organized digital repository.
2. Efficient Distribution: Easily share worship media with team members, worship leaders, or volunteers, streamlining communication and ensuring everyone has access to the latest resources.
3. Synchronization: Achieve synchronization across multiple devices, allowing seamless transitions between planning on a computer and presenting during services using tablets or other devices.
4. Version Control: Keep track of changes made to worship media files, ensuring everyone is on the same page and minimizing the risk of errors during services.
In the dynamic world of digital church media, Dropbox stands as a reliable ally, providing a secure and collaborative environment to enhance your worship services. Embrace the convenience, accessibility, and efficiency Dropbox offers to elevate your digital church media experience and, ultimately, the impact of your worship services.
How to Change Fonts in the Quick Editor
The awesome Quick Editor tool allows you to customize any motion or still background in a collection with your own text or elements. Use the pre-installed fonts or add your own. It’s so easy!
Changing Fonts in the Quick Editor
To further personalize your worship services, we’re excited to guide you on how to use fonts to customize your media with the Quick Editor. Follow these simple steps to bring a unique touch to your content:
- Access the Quick Editor: Log in to your Shift Worship account and navigate to the Quick Editor. If you haven’t already, select or create a project where you’d like to customize the fonts. Your first step will consist of choosing a motion or still background, and selecting the format as well.
- Text Element Selection: Most designs will generate a prompt for you to “edit this text”. You can delete that text box or add a new one by locating the “add text” element within your project (Bottom of the Quick Editor). Click on the text box you wish to modify to activate the text editing options.
- Font Selection: In the text editing toolbar, you’ll find the “text” option. Click on it to reveal a dropdown menu showcasing a variety of available fonts, colors, and formatting options.
- Browse and Choose: Scroll through the font options to find the one that aligns with the tone and style of your worship service. Select the text you would like to change and then click on your preferred font to apply it instantly to the selected text.
- Adjust Font Size and Style: Adjacent to the font selection, you’ll find options to adjust the size and style of your text. Experiment with these settings to achieve the desired look for your worship slides.
- Save Your Edits: Once you’re satisfied with the font customization, remember to download your changes to preserve your creative work. You can do this by clicking the “download” button within the Quick Editor interface (bottom right).
Feel free to explore different fonts and combinations to create a visually captivating worship experience. If you encounter any challenges or have further questions, don’t hesitate to reach out to our support team.
Uploading Your Own Font
Now that you are a pro at editing text in the Quick Editor, you have the flexibility to upload your own fonts, adding a unique touch to your content. Follow these generic steps to incorporate custom fonts seamlessly:
- Access the Quick Editor: Log in to your Shift Worship account and navigate to the Quick Editor. Select or create a project where you’d like to upload custom fonts.
- Text Element Selection: Locate the “Text” element within your project. Click on “Advanced: Use Your Own Fonts”.
- Font Upload Option: Look for the “Custom Font” or “Upload Font” option in the font dropdown menu. Click on it to initiate the font upload interface.
- Choose Your Font File: You can upload font files in various formats such as .ttf or .otf . Click on the designated upload button and select the font file from your device or drag and drop the file.
- Verify Compatibility: Ensure that your custom font is compatible with the Shift Worship Quick Editor. The software works seamlessly with popular font providers like Adobe Fonts and Google Fonts.
- Apply Your Custom Font: Once uploaded, your custom font will appear in the font dropdown menu. Select it to apply the unique style to your selected text.
- Fine-Tune as Desired: Adjust the font size, style, and any other formatting options as needed to create a cohesive and visually appealing design.
By uploading your own fonts, you have the creative freedom to infuse your worship content with a personalized touch. Should you encounter any challenges or have questions, our support team is here to assist you.
What is the Quick Editor?
Introducing the Shift Worship Quick Editor – an innovative, in-browser editing software designed exclusively for members of the Shift Worship community. This powerful tool empowers users to elevate their worship presentations with unprecedented ease and creativity.
With the Quick Editor, members can seamlessly customize their worship content by selecting from a diverse library of motion and still backgrounds. Whether seeking a serene backdrop for reflective moments or dynamic motion backgrounds to amplify energy, the Quick Editor provides a wide array of options to suit every worship context. Users can also choose from various formats, ensuring compatibility with different display systems and preferences.
Tailoring your worship experience has never been simpler. The Quick Editor’s user-friendly interface enables members to effortlessly add and manipulate text, integrate impactful images, and incorporate essential elements to enhance their presentations. Whether you’re crafting a sermon series, creating promotional material, or developing engaging worship slides, the Quick Editor streamlines the process, allowing you to focus on delivering a meaningful and immersive worship experience.
Unlock the potential of your creativity with the Shift Worship Quick Editor – where customization meets convenience, and every worship presentation becomes a canvas for inspiration. Elevate your worship experience today with the power of in-browser editing at your fingertips.
Try Quick Editor with a Free Trial
Embark on a transformative journey of worship design with the Shift Worship 30-Day Free Trial! Unleash the full potential of your creative expression by gaining exclusive access to the innovative Quick Editor during this trial period. Craft compelling worship presentations effortlessly, choosing from a rich library of motion and still backgrounds. With the Quick Editor, you can personalize your content by adding text, images, and elements, elevating your worship experience to new heights.
During these 30 days, immerse yourself in the versatility of the Quick Editor, experiencing firsthand its user-friendly interface and powerful customization features. Explore the ability to choose from various backgrounds, select different formats, and even upload your own fonts for a truly unique touch. Uncover the limitless possibilities of worship design, all at no cost.
Don’t miss out on this opportunity to enhance your worship presentations. Join the Shift Worship community with our 30-Day Free Trial, and let the Quick Editor be your companion in creating impactful and inspiring worship content. Start your trial today and witness the transformative capabilities that await you!
Adding PNG Elements to the Quick Editor
Add Your Own Elements
Now you can add your own PNG art elements (including church logos) to the Quick Editor. The video above gives you a visual demonstration of how to do this, but you can also keep reading for more information!
What is a PNG?
A PNG is an image file format used for storing and transmitting images made up of individual pixels. (Pixel: Smallest invisible unit of a digital image, showing a single point of color or light on a screen). PNGs are perfect for logos, diagrams, and graphics with sharp edges since they maintain their original quality. Another unique factor of PNGs is that they have the capability to become fully transparent, partially transparent, or opaque. (This is great for blending backgrounds). With this file format, you can also compress the file to balance image quality and file size.
How-To Use the Element Section
To begin, head to Shiftworship.com, and select the collections page. Once you select the desired collection you will then open the Quick Editor (found on the upper-right side of the screen). From there, you can select the format and size that you need. In the video, an HD motion is used! The option to adjust and add text should then appear (bottom of the screen). To add a transparent PNG into Quick Editor, hover over the ‘Elements’ option on the bottom left of the Quick Editor screen. You will then see two different options appear. The first, “My Elements”, displays any elements (like PNGs) that you have uploading into Quick Editor. The second section is “All Elements”. All Elements is a constant updating library of various transparent PNGs that are included in the Quick Editor. These are extra items that allow you to take your editing skills to the next level!
Customizing Media With Elements
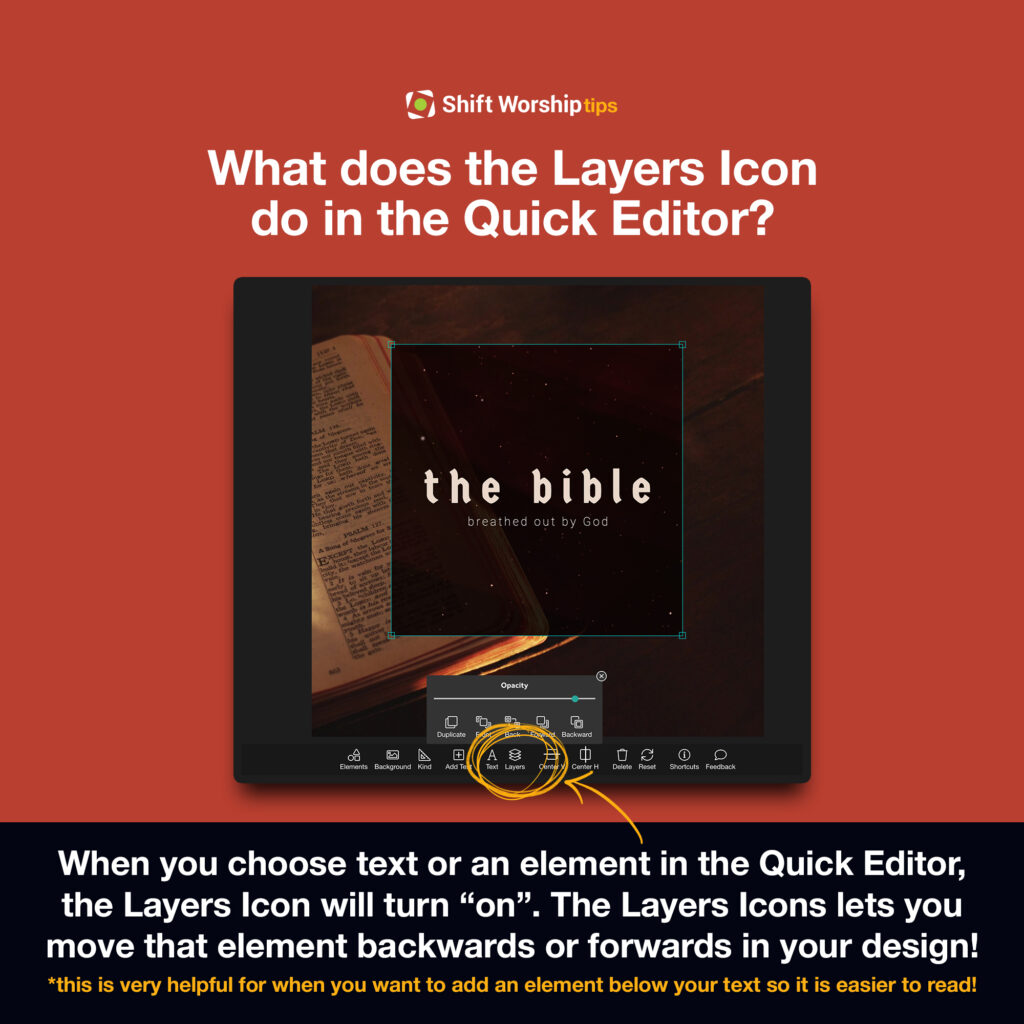
To add an element to your media, select the “Element” button, click on the desired element-and you should see the PNG on your media! From there, you are able to move and resize the element to fit the design. Utilize the “Layers” function of Quick Editor to create special effect and designs with your elements. This is a great tool for if you are wanting to have text appear in front of a logo, or other element.
Designs that are great for utilizing your own images:
- Announcements
- Community Events
- Small Group Updates
- Offering Call to Actions
- Camp Updates
- Holiday Programs
Uploading Elements
To upload your own elements, open the Quick Editor and click the “Elements” option on the bottom left. Select “My Elements”. to upload, simply drag the desired PNG file into the Elements section or the graphic background! Your PNG element will then be stored under “My Elements” for future use. Pro tip: upload multiple PNGs to create amazing media!
Turning Files Into PNGs
If you are experiencing any issues with uploading your images, we recommend verifying that the file is a PNG. Most computers will have the option to edit the file, and then prompt you to save it as a PNG format.

